By Ariel Armanino

Whether you’re hosting a party, celebrating a holiday, or headed to a friend’s for wine night—everyone loves a scrumptious spread of meats and cheeses. And thankfully, Lincoln Center has everything you need to make the cheese board of your dreams! Learn how to put together your own delicious board with Lexi Abood, owner of local custom charcuterie company The Tipsy Grazer. Follow along and get to grazing!
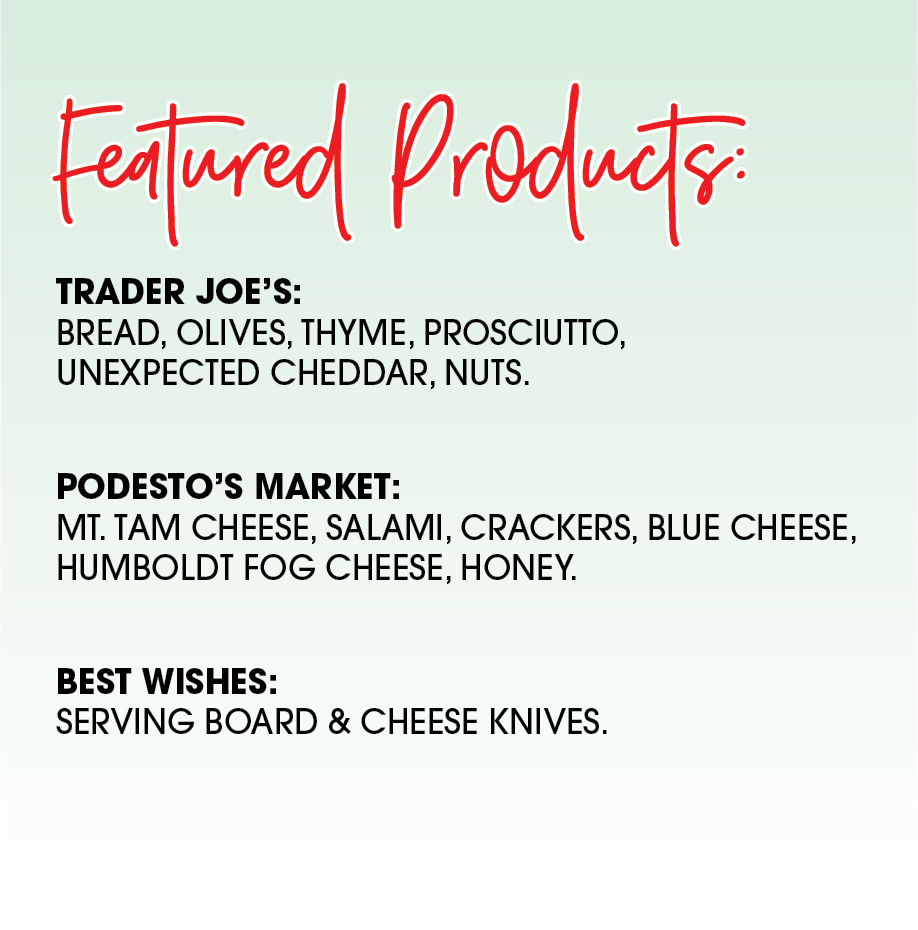
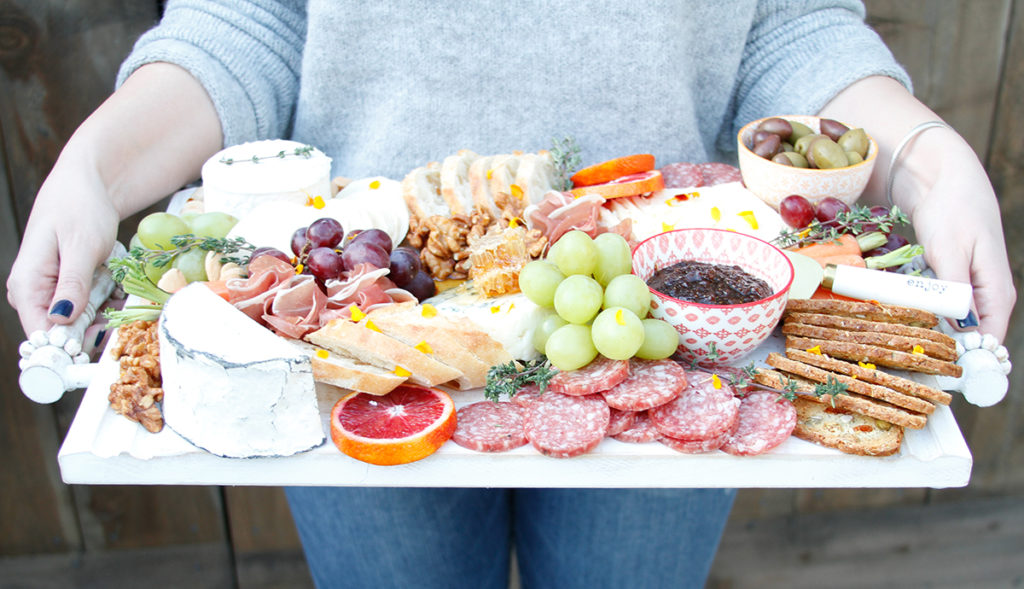
STEP 1: GATHER THE GOODS
Before you get started creating your board, it’s important to plan out your vision! Choose what kind of canvas you’d like, such as a beautiful stacked or flat board, both of which can be found at Best Wishes. Next, compile an ingredient list before hitting Podesto’s Market and Trader Joe’s for all of the perfect specialty items!
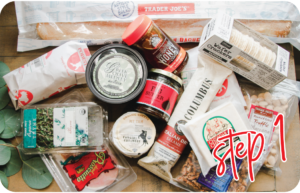
STEP 2: TAKE IT CHEESY
 First, place your cheese, as this will be the focal point of your spread. Depending on the size of your board, Lexi recommends having anywhere from 3-5 different kinds of cheese: one hard cheese, one soft cheese, and one blue cheese. Lexi’s go-to picks are Trader Joe’s Unexpected Cheddar for a crowd-pleasing hard cheese, Cowgirl Creamery’s Mt. Tam for something soft and spreadable, and the classic Point Reyes Blue Cheese to for something bold—both available at Podesto’s Market.
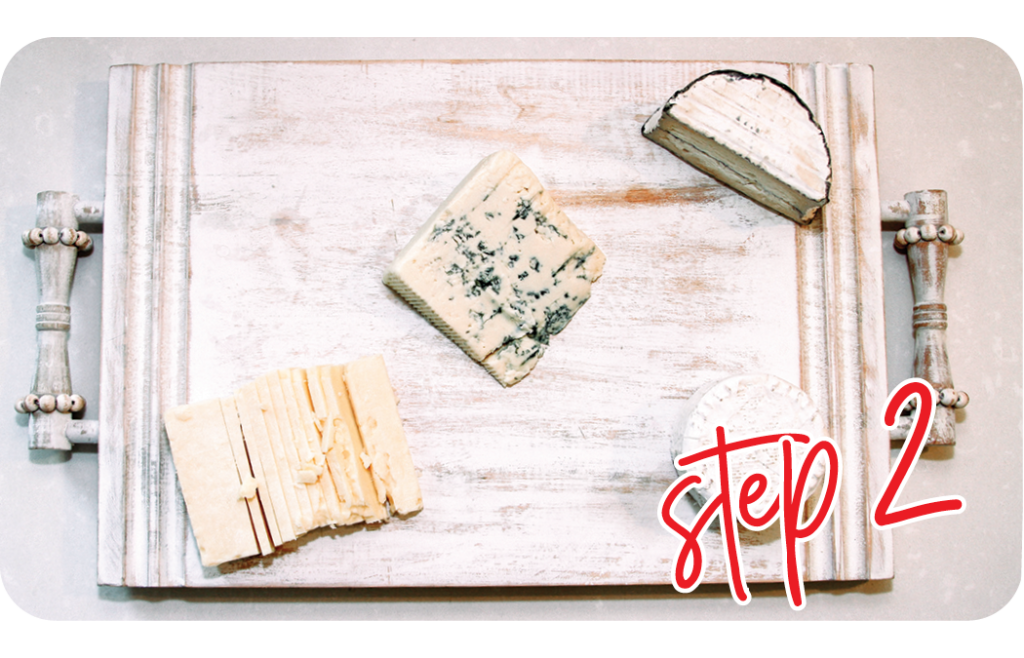
STEP 3: CRUNCH TIME
Next, place the items that will act as the vehicles for all of the meat and cheese. Choose different types of bread, crackers, and vegetables that have different textures and flavor profiles that will complement your cheese choices and place them throughout.
STEP 4: PUMP UP THE JAM
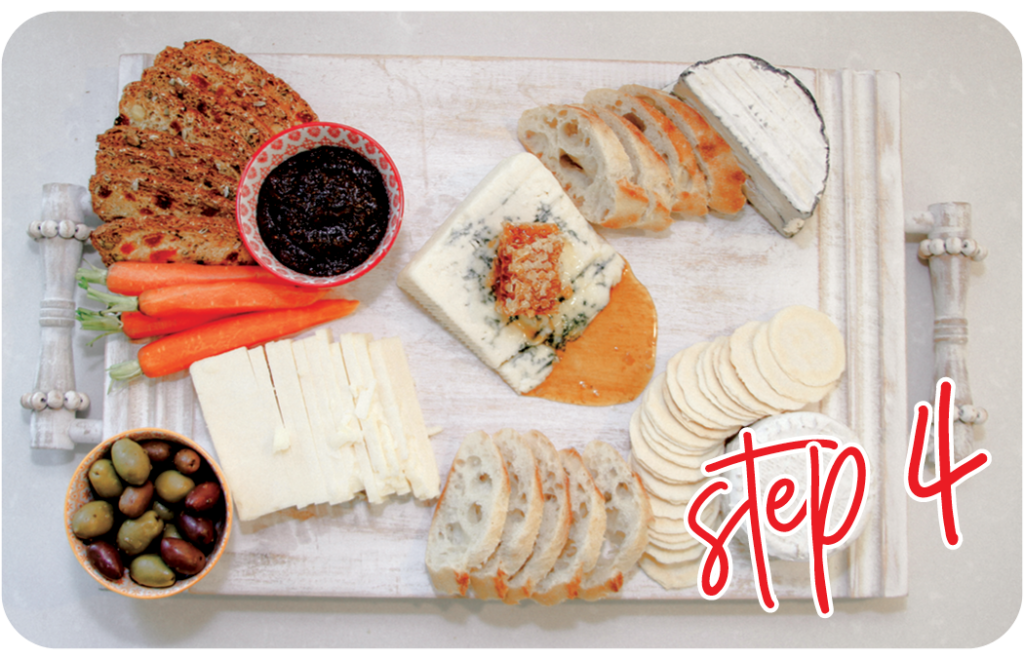 Add a bit of sweetness and complexity to your board with jams, pepper jellies, honey, and dips. For this board, Lexi added fig butter for a fruity pop and placed honeycomb over the blue cheese, creating a perfect flavor profile of tangy, savory, and sweet.
STEP 5: MEAT YOUR MATCH
Choosing a variety of thinly sliced and cured meats, such as prosciutto and different types of salami are the perfect savory addition. Rolling or folding the meats as you place them on the board not only makes it easy for guests to grab and go, but it adds a beautiful aesthetic! If you’re looking for something a bit bolder, you can also opt for more interesting choices such as mortadella or a meat pâté.
STEP 6: GO NUTS!
All of the extras and finishing touches are what takes your cheeseboard to the next level—both in terms of taste and visuals. Fill in any remaining open spaces with nuts, and add extras such as fresh and dried fruits, olives, pickles, and veggies for bursts of flavor (and color). Lexi likes to shop seasonally and add items that add color to her board.
Finally, add any finishing garnishes such as herb sprigs, edible flowers, or whatever tickles your fancy. And most importantly, have fun with it!
[gdlr_divider type=”solid” size=”50%” ]
Follow @TheTipsyGrazer on Instagram for inspiration for building your own charcuterie and cheese board!